
A soft water loop is not necessary for the installation of a water softener, but it can help address the problems caused by salt-based softeners and save on water treatment costs.
What Is A Water Softener Plumbing Loop?
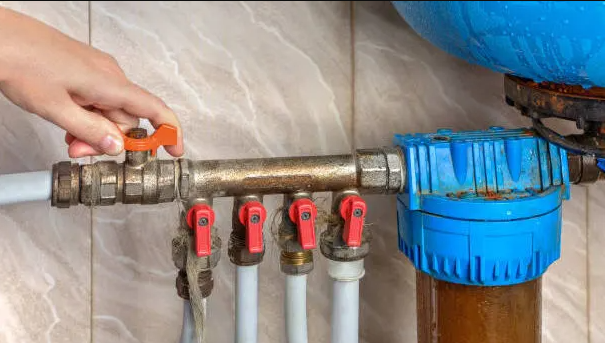
A water softener plumbing loop is a system designed to facilitate the installation and efficient functioning of a water softener. It involves a series of components and configurations that help manage the flow of water, particularly in homes with hard water issues.
The Components Of A Loop (valves, Bypass, Piping) With Clear Visuals
When creating a water softener plumbing loop, several components are essential for its proper operation:
- Valves: Control the water flow through the softener and the plumbing loop.
- Bypass: Allows water to bypass the softener for tasks that do not require softened water.
- Piping: Transports water to and from the softener and loop, ensuring proper distribution and return.
Different Loop Configurations (u-shape, Bypass Setup) And Their Applications
Water softener plumbing loops can be configured in various ways to suit different applications:
| Configuration | Application |
|---|---|
| U-shape | Ideal for compact spaces, providing efficient water flow |
| Bypass setup | Allows for easy switch between softened and unsoftened water |
Loop Installation From Traditional Full-line Plumbing
Unlike traditional full-line plumbing, a water softener plumbing loop focuses on specific water treatment needs and provides the flexibility to control the flow of both softened and unsoftened water, ensuring efficient use and conservation of softening agents.
Benefits Of Installing A Water Softener Loop
Installing a water softener loop can bring numerous benefits to your home plumbing system. These advantages range from simplified installation and maintenance to cost savings, convenience, flexibility, and water conservation. Let’s explore each of these benefits in detail.
The incorporation of a water softener loop simplifies the process of connecting and servicing your softener system. With a dedicated loop, installation becomes easier as it allows for a direct connection between your main water supply and the softener. This means you can avoid the need for extensive additional plumbing and can enjoy a streamlined installation process.
In terms of maintenance, having a water softener loop makes it more convenient to service your system. The loop provides easy access to the softener for routine maintenance tasks, such as changing filters or adding salt. This ensures that your softener remains in optimal condition, allowing it to effectively remove hardness-causing minerals from your water.
Installing a water softener loop can bring potential cost benefits compared to a full-line plumbing system. By using a loop, you can bypass the need to install a softener for the entire plumbing system, focusing instead on select areas such as sinks, showers, or water heaters that require softened water. This targeted approach can save you money by reducing the amount of equipment and plumbing required for your softening needs.
A water softener loop offers the convenience and flexibility of directing soft water to specific areas of your home or bypassing the softener altogether. With a simple valve adjustment, you can choose to have softened water flowing to your showers and faucets while bypassing areas that may not require it, such as outdoor spigots. This level of control allows you to tailor the use of softened water, providing flexibility based on your needs and preferences.
A water softener loop can help conserve water by preventing unnecessary softening of outdoor water. By isolating areas that receive treated water, you can avoid wasting softened water on tasks like watering your garden or washing your car. This not only conserves water but also reduces the amount of salt used in the softening process, benefiting both the environment and your wallet.
Installing A Water Softener Loop
To improve water quality, consider installing a water softener loop. This loop separates treated water from the rest, preventing issues caused by salt-based softeners. With this setup, you can address concerns about plant health and save on water treatment expenses while enjoying the benefits of soft water.
Installing A Water Softener Loop: A Step-by-step Guide
When it comes to installing a water softener in your home, creating a loop is an essential step to ensure efficient and effective water softening. In this guide, we will provide you with a step-by-step process, along with safety precautions, to help you install a water softener loop properly.
Step-by-step Guide With Clear Instructions And Safety Precautions
1. Turn off the main water supply: Before you start any plumbing work, it’s important to shut off the main water supply to your home. This will prevent any accidental leaks or water pressure issues while you are working.

2. Locate and mark the loop location: Determine the best spot to install your water softener loop. Typically, it is recommended to install it near the water heater or utility room. Once you have identified the location, mark it clearly for reference.
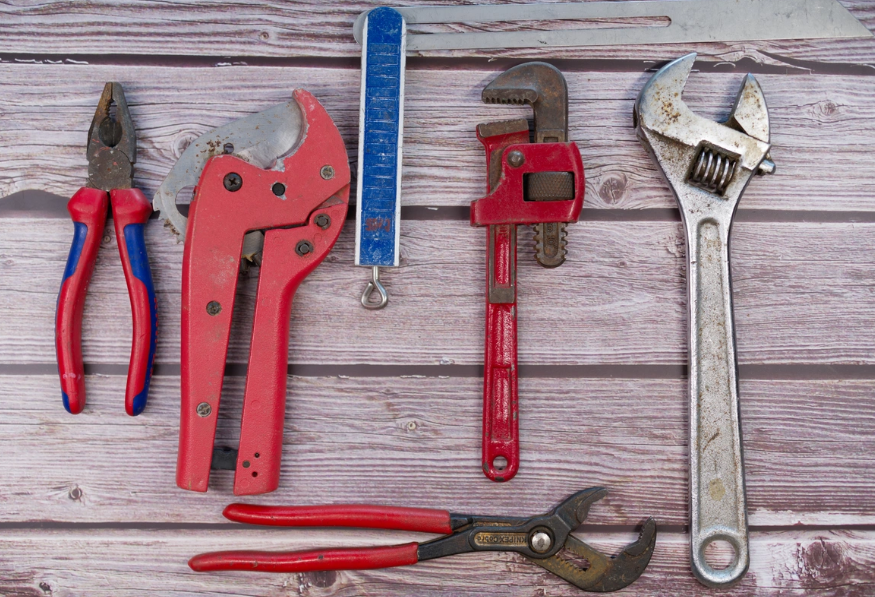
3. Gather the necessary tools and materials: To successfully install a water softener loop, you will need the following tools and materials: – PEX tubing or copper piping – Fittings and connectors – Shut-off valves – Pipe cutter or tubing cutter – Adjustable wrench – Teflon tape or pipe dope

4. Prepare the plumbing: Measure and cut the PEX tubing or copper piping according to the length needed for the loop. Make sure to leave extra length for fittings and connections. Use a pipe cutter or tubing cutter to achieve clean and accurate cuts.
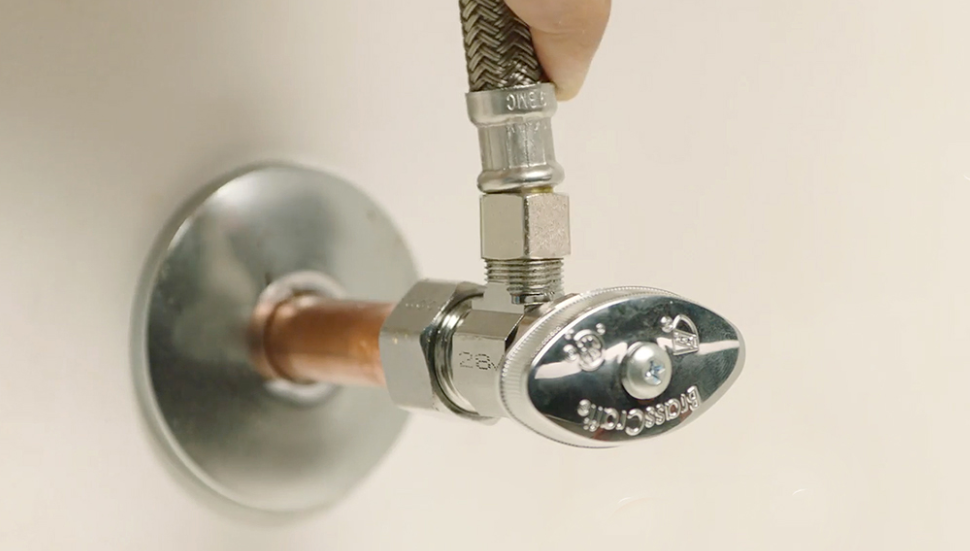
5. Install shut-off valves: Install shut-off valves at both ends of the loop. These valves will allow you to isolate the water softener loop from the rest of the plumbing system for maintenance or repairs.

6. Connect the loop: Connect the PEX tubing or copper piping using fittings and connectors. Ensure a tight and secure connection with the help of an adjustable wrench. Apply Teflon tape or pipe dope on threaded connections to prevent leaks.
7. Test for leaks: Once the loop is connected, turn on the main water supply to your home. Carefully inspect the loop for any signs of leakage. If you notice any leaks, tighten the connections or replace any faulty components.
8. Connect the water softener: Once the loop is leak-free, connect your water softener system to the loop according to the manufacturer’s instructions. This typically involves connecting the inlet and outlet of the water softener to the loop using additional fittings and connectors.
9. Monitor and maintain: Regularly monitor the water softener loop for any signs of leaks or malfunctions. Perform routine maintenance as recommended by the water softener manufacturer to keep the system running smoothly.
Tips For Choosing The Right Loop Materials And Tools
When selecting materials and tools for your water softener loop installation, keep the following tips in mind:
1. Choose the appropriate tubing: Consider using PEX tubing or copper piping for your water softener loop. PEX tubing is flexible, making it easier to maneuver and install. Copper piping, on the other hand, offers durability and longevity.
2. Size the loop properly: Ensure that the size of the loop matches the flow rate of your water softener system. This will optimize the effectiveness of the water softening process.
3. Invest in high-quality fittings and connectors: Opt for reliable fittings and connectors to prevent leaks and ensure a secure connection between the loop components.
4. Follow safety precautions: Always wear protective gear, such as gloves and safety glasses, when handling tools and working with plumbing materials. Additionally, turn off the main water supply before starting any installation work to prevent accidents and water damage.
By following these step-by-step instructions, utilizing visuals, and considering these tips for materials and tools, you can successfully install a water softener loop in your home. Enjoy the benefits of softened water while ensuring the longevity and efficiency of your plumbing system.
Common Issues And Troubleshooting
Address Potential Problems And Solutions
Water softener plumbing loops are essential for ensuring the efficient operation of water softener systems. However, like any plumbing component, they can experience issues that require troubleshooting. Understanding common problems and their solutions will help ensure your water softener plumbing loop continues to function optimally.
Water Heater Issues
If you notice that the water from your softener is not heating efficiently, it may be due to a potential issue with the water heater. This could be caused by mineral buildup from hard water affecting the functionality of the heater. To troubleshoot, consider flushing the water heater to remove any sediment or mineral deposits. Additionally, check the cold water line to ensure no blockages are affecting the flow to the water heater.
Cold Water Line Blockages
A common issue in water softener plumbing loops is blockages in the cold water line. This can affect the flow of water into the softener system, leading to reduced efficiency. To address this problem, carefully inspect the cold water line for any obstructions and clear any debris or buildup that may be causing a blockage. Regular maintenance and monitoring of the cold water line can help prevent such issues from occurring.
Comparative Analysis: Loop Vs. Full Line Installation
A comparative analysis between the loop and full line installation for water softener plumbing reveals that a soft water loop is not necessary for installation. Homeowners can avoid the issues caused by salt-based softeners by isolating areas that receive treated water, saving on water treatment costs.
Pros And Cons Based On Water System Requirements
Pros
- Efficient Water Usage: The loop installation allows for targeted water treatment, ensuring that only the necessary water is softened. This leads to reduced water consumption and cost savings.
- Minimal Maintenance: With a loop installation, the water softener is only connected to specific areas that require softened water. This reduces the need for maintenance and filter replacements, resulting in lower overall maintenance costs.
- Improved Water Quality: By isolating treated water to specific areas, homeowners can enjoy the benefits of softened water where it matters most, such as showers and faucets. This leads to softer skin, shinier hair, and cleaner dishes.
Cons
- Higher Initial Cost: Loop installations may require additional plumbing work, increasing the initial cost compared to a full-line installation.
- Limitations on Water Usage: The loop installation restricts softened water to specific areas. If there is a need for softened water throughout the entire plumbing system, a full-line installation may be more suitable.
- Potential for Hard Water Contamination: If the loop installations are not properly maintained, there is a risk of hard water contaminating the treated water supply. Regular inspections and maintenance are necessary to prevent this issue.
By considering the pros and cons based on their specific water system requirements, homeowners can decide whether a loop installation or a full-line installation is more suitable for their needs.
Cost Analysis And Budgeting For Installation
When it comes to installing a water softener plumbing loop, it is essential to consider the cost analysis and budgeting involved. Understanding the costs and budgeting tips can help you plan and allocate your resources effectively. In this section, we will provide an overview of the costs involved and share some budgeting tips to help you navigate the installation process smoothly.
Overview Of Costs Involved
Before you start the installation of a water softener plumbing loop, it’s important to be aware of the costs associated with the project. Here is a breakdown of the primary expenses you may incur:
| Cost Item | Estimated Expense |
|---|---|
| Water Softener System | $500 – $2,500 |
| Plumbing Materials | $100 – $300 |
| Professional Installation | $300 – $1,000 |
| Permits and Inspections | $50 – $200 |
These are just approximate figures and can vary depending on various factors like the size of your property, the complexity of the installation, and local market rates. It’s always a good idea to get quotes from multiple contractors and suppliers to get an accurate cost estimate for your specific requirements.
Budgeting Tips
To ensure a smooth installation process and stay within your budget, here are some helpful budgeting tips:
- Research and compare prices from different suppliers and contractors to get the best possible deal on the water softener system and plumbing materials.
- Consider installing the water softener system yourself if you have the necessary skills and expertise, as it can significantly reduce professional installation costs.
- Plan and allocate a contingency fund for any unexpected expenses that may arise during the installation process.
- Consult with a professional plumber or contractor to assess your property’s specific plumbing requirements and identify any potential challenges or additional costs.
- Take advantage of any available rebates, incentives, or financing options offered by water softener manufacturers, local utilities, or government programs.
By following these budgeting tips and being mindful of the costs involved, you can effectively manage your finances and ensure a successful installation of your water softener plumbing loop.
Frequently Asked Questions Of Water Softener Plumbing Loop
Is A Soft Water Loop Necessary?
A soft water loop is not necessary for the installation of a water softener. It is primarily used to address issues caused by salt-based softeners, such as dietary concerns and harm to plants. However, homeowners can still install a water softener without a pre-plumbed loop and meet the needs of the softener easily.
Can A Water Softener Be Installed Without A Loop?
Yes, a water softener can be installed without a loop. It is not required for installation, and the three necessary needs of a water softener can be easily provided without a pre-plumbed water softener loop.
Does My House Have a Water Softener Loop?
If your house has a water loop, installing a water softener will be easy. Look for an extra copper pipe on the wall near your water heater with a cap on the end. This pipe indicates the presence of a water loop.
If you don’t have a loop, a water softener can still be installed without it.
How Should A Water Softener Be Plumbed?
Be used to plumb the water softener. This ensures that all water flowing into your home is treated for hardness.
Is A Soft Water Loop Necessary?
The primary purpose of a soft water loop is to address the problems caused by salt-based softeners, such as dietary issues and harmful effects on plants and gardens. By isolating areas that receive treated water, homeowners can avoid these issues while saving on water treatment costs.
Conclusion
A soft water loop can effectively eliminate the adverse effects of salt-based softeners by isolating treated water. This not only avoids potential health and environmental issues but also reduces water treatment costs. Whether your home needs a pre-plumbed loop or it can be easily installed, a soft water loop is a valuable addition to any water softening system.
Leave a Reply